Master Fluffy Fried Rice With These 4 Pro Heat Techniques
"Stop fighting with sticky, clumped rice; learn the professional coating and heat method to turn a single frying pan into a flavor machine."
If you have ever stared down a pan of gummy, clumping rice that looks more like a wet mash than a dinner, you know the frustration of a failed fried rice attempt. To achieve restaurant-quality grains, you must master the relationship between starch, oil, and heat.
Key Takeaways
* The Golden Rule: Use cold, leftover rice (or freshly cooked rice cooled completely) to prevent mushiness. * est. The Coating Secret: Coat rice grains with oil or egg *before* hitting the high heat to ensure individual grain separation. * Heat Management: Master the transition from ingredient sautéing to high-heat tossing. * The Order Matters: Sauté aromatics → Proteins → Rice → Seasoning.

Why does my fried rice always turn into a mushy clump?
At 6:30 PM on a Tuesday, you stand in your kitchen, spoon in hand, peering into a pan where the rice has fused into a single, heavy mass. You expected fluffy, individual grains, but instead, you have a starch-heavy brick that sticks to the pan and your spatula.
The primary culprit is the moisture trap. When you use hot, steaming rice straight from a rice cooker, the starch is still active and gelatinized. Adding oil to hot, wet rice creates an instant starch glue that binds the grains together before they can even begin to fry.
The starch factor is the scientific reason why "day-old" rice is the gold standard. As rice cools in the refrigerator, it undergoes a process called retrogradation, where the starch molecules reorganize into a firmer, more stable structure.
This firmer structure allows the grains to remain distinct when they hit the heat.
You might also be facing the pan capacity issue. If you crowd a standard 10-inch frying pan with too much rice, the temperature drops instantly.
Instead of the heat evaporating the surface moisture to create a "fry," the mass of rice begins to steam in its own trapped moisture, leading to a gummy texture.
While a wok is the traditional tool for this task, a flat-bottomed frying pan is often better for beginners because it provides more direct contact with the burner. However, without the right technique, that flat surface can easily become a trap for clumping starch.
Preparation: The "Zero-Clump" Setup
You sit at your kitchen island, spreading a tray of cold rice across the surface, gently pressing down with your fingers to ensure no large lumps remain. This preparation phase is where the battle against mushiness is won or lost.
To prepare your rice, you must break up any clumps in a bowl while it is still cold. If you wait until the rice hits the hot oil to try and break it apart, you will likely smash the grains, releasing more starch and causing clumping.
The ideal ratio of oil to rice is approximately 1:10 by volume. This ensures that every single grain is sufficiently lubricated, allowing it to slide against its neighbors rather than sticking to them.
For your mise en place, cut all ingredients into uniform, small sizes. Because the frying process happens very quickly at high heat, you won't have time to chop an onion while the garlic is burning.
If you want a richer flavor, use the Egg Coating Method. Instead of frying the egg separately, whisk the egg into your cold rice in a large bowl before adding it to the pan. This coats each grain in a thin layer of fat and protein, acting as a barrier that prevents the starch from sticking.
Step-Step: The Professional Frying Sequence
The kitchen is filled with the sharp scent of garlic as you slide the pan onto the burner, the oil shimmering under the overhead light. This sequence is the difference between a messy scramble and a professional meal.
Step 1: The Aromatic Base Heat your oil in the pan until it reaches a temperature between 160°C and 180°C (roughly 320°F to 350°F). Add your aromatics—garlic, onions, or green onions—and sauté them just until they become fragrant.
Step 2: Protein Searing Add your meats or harder vegetables to the pan. Cook them until they are about 80% done, then push them to the edges of the pan or remove them entirely to make room for the rice.
Step 3: The Rice Integration Add the rice to the center of the pan. Spread it out in a thin layer and let it sit undisturbed for about 60 seconds. This allows the bottom layer to "fry" and develop a slight crust before you begin tossing.
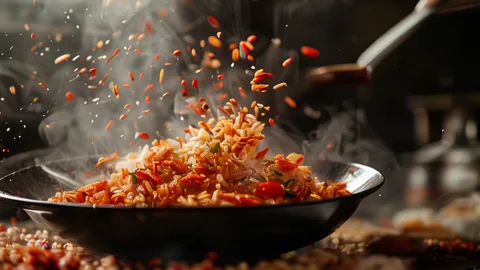
Step 4: The High-Heat Toss Use a "push and fold" motion with your spatula. Instead of stirring in circles, push the rice toward the edges and fold the center over. This prevents the grains from being smashed and keeps the texture light.
Step 5: The Final Seasoning This is a crucial professional secret. Do not pour soy sauce or oyster sauce directly onto the rice. Instead, pour the liquid around the *edges* of the pan where it hits the hot metal first.
This caramelizes the sauce instantly, infusing the rice with flavor without making it soggy.
| Step | Action | Goal |
|---|---|---|
| 1 | Aromatics | Build the flavor base |
| 2 | Proteins | Cook through without overdoing it |
| 3 | Rice | Develop a toasted exterior |
| 4 | Toss | Ensure even coating and airiness |
| 5 | Seasoning | Caramelize sauce for depth |
Pro-Level Heat Control: The Secret to "Wok Hei" in a Frying Pan
The pan is smoking slightly, the oil is rippling like water, and the heat is intense enough that you can feel it radiating against your skin. This is the environment required to mimic the "breath of the wok" in a home kitchen.
The temperature delta is vital. You need the pan to be hot enough that any moisture released from the ingredients evaporates almost instantly. If the pan is too cool, the ingredients will boil in their own juices rather than fry.
Always perform the Sizzle Test. Before adding the rice, the oil should shimmer or ripple. If you drop a tiny grain of rice into the pan and it doesn't dance or crackle immediately, your pan is too cold.
Never cover the pan with a lid during the frying process. Covering the pan traps steam, which is the enemy of fried rice. The goal is to cook through evaporation, not through steaming.
If the pan cools down too much while you are loading ingredients, wait a moment to let the heat recovery happen. If you add too much cold food at once, the temperature will crash, and you will end others in a mushy mess.
Failure Recovery: What to do when things go wrong?
You look down at the pan, feeling that sinking feeling in your stomach because the rice looks darker or wetter than you intended. Before you throw the meal in the trash, use these recovery tactics.
Scenario A: "My rice is too mushy/wet" If the rice is too wet, spread it out thin in the pan and crank the heat to maximum. Use your spatula to gently press the rice against the hot surface to evaporate the excess moisture.
Scenario B: "The rice is too dry/hard" If the rice is too dry or crunchy, it lacks moisture. Add a very small amount of stock or a splash of soy sauce at the very end, then toss vigorously to redistribute the moisture without turning it into mush.
Scenario C: "The bottom is burnt" If the bottom layer is scorched, do not scrape the burnt bits into the rest of the rice. Carefully lift the top layer out, discard the burnt bottom, and use the remaining ingredients to start a new batch in a clean pan.



Comments 0